Daily Archives: July 3, 2007
Tech Tuesday with BenSpark #8
Posted by Me on the Fuel My Blog Blog –

This one is for all you budding Digital Photographers out there. I was inspired to let you see my editing process for Photo-A-Day. I’ve got a pretty good routine down to edit and file my images for Photo-A-Day. And this month I am sponsoring a photography related contest called Win an XShot from BenSpark. And the great news is that the contest is open to anyone the world over.
I mostly shoot with either a Canon SD800is or a Nikon D80. The Canon is a pocket sized point and shoot with a image stabilizer built into the lens. It has a decent zoom and the pictures are 7.1MP. The Nikon is a DSLR and I have two lenses, a Sigma 70mm – 300mm Telephoto with Macro and a Sigma 28mm – 70mm one for all purpose shots. Both of these cameras take great pictures but before I post anything online I do a few edits.
First step is to get the image from the camera. I usually do this with the card reader slot on the computer or the monitor. I preview my images on the computer screen and pick the one that will get the top honor of Photo-A-Day. Sometimes when I shoot I just go till I get the one I want and the ones prior to the ‘good’ one are either made into bonus shots or files away.
So I get my image and open it with PhotoShop Elements 4.0 (I still need to upgrade to 5.0). I look at the image and then choose the Quick Fix mode. I used to just apply unsharp mask, crop and then save. It was very basic. Using the Quick fix you can have the program make some auto corrections to your image or you can control the amount of ‘fix’ you want. But by clicking Quick Fix you see two copies of your image, the original and the one you will be modifying.
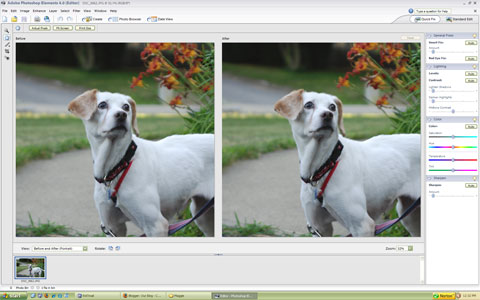
Smart Fix – This is where the program tries to fix everything that it thinks needs fixing. Try out the auto but it is not the end all be all for fixes. In fact, I hardly ever use auto for these fixes. I take the slide bar and move it to the right as much as I want, all the while paying attention to what is happening to the editable photo. Once I see the desired change I want, I stop and apply that ‘fix’.
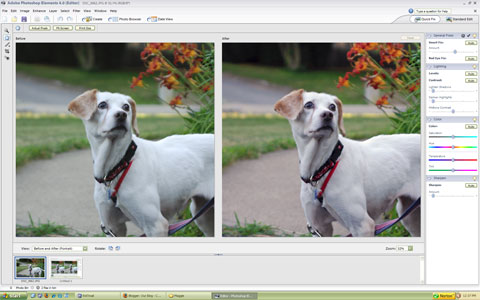
Notice that the image on the right looks more true to a color you would see on a dog, and the one on the left looks more blueish/greenish. The Smart Fix lightened up the image and gave it a more realistic tone.
Lighting – With lighting you have a few things, there are levels and contrast options to automatically set the lighting level and auto contrast. And then you have 3 sliders to control the Lightening of Shadows and the Darkening of Highlights and then the ability to adjust the Midtone Contrast. I slide these all over the place to get the best possible lighting look for my image.
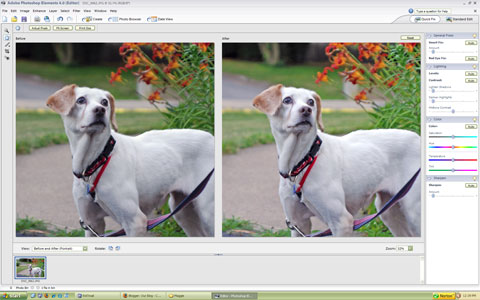
Color – You can click the auto button here to have the program adjust the color or you can adjust the sliders for Saturation, Hue, Temperature and Tint. The one thing I use most often here is Saturation, this can make the colors more vibrant or more muted. You can totally de-saturate the image of color and make it grayscale or you can go crazy with the color. I bump the color up just a bit.
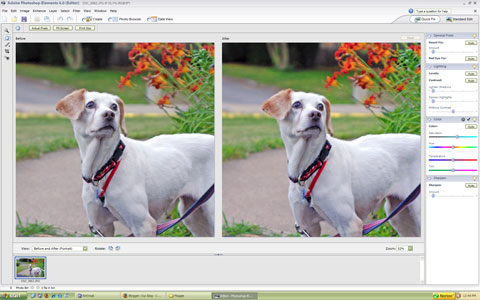
Sharpness – When an image comes of the scanner or from a digital camera you almost always need to give the sharpness a little help. I used to use Unsharp Mask according to how I learned the tool from Taz Talley (His workshops are great). Unsharp mask has been my friend for a long time. It makes the image pop more with sharpness. Luckily the Sharpen too under the Quick Fix is actually unsharp mask. I play with the sliders till I see the sharpness I desire and then I apply it.
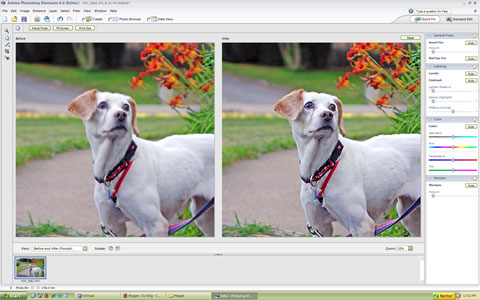
Now my image is almost complete. I take the crop tool and set a custom size of 450 px (pixels) X 350 px (pixels) at 96dpi (dots per inch) (I am not sure why I choose this but I think it has to do with how my old blog used to display images and this was the largest reasonable size to use.) I drag my crop marks around the image and then crop it. What I look for is to get my main subject into the image and also use the natural word to frame the image. Maggie the dog is clearly my subject but I like how the color of the flowers behind her stand out as compared to her coat.
My Original Image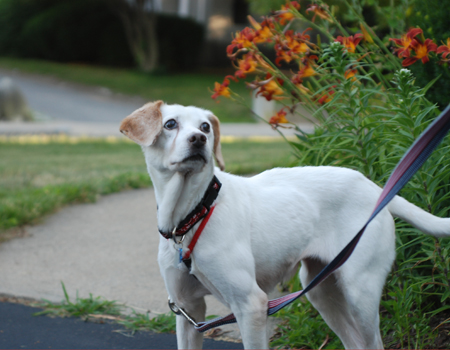
My Edited Image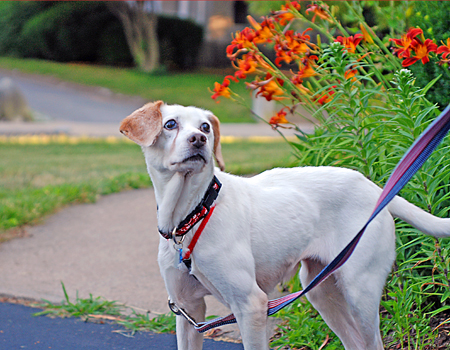
If at any point you feel that you have done irreparable harm to your image by adjusting the sliders and applying all sorts of fixes, remember that you can always click revert and start again from scratch.
One last thing, when you are saving your images you may be tempted to use Save for the Web. Don’t. I did that for a while but realized that this strips the photos of their EXIF data. What is EXIF data? Flickr defines it as…
Almost all new digital cameras save JPEG (jpg) files with EXIF (Exchangeable Image File) data. Camera settings and scene information are recorded by the camera into the image file. Examples of stored information are shutter speed, date and time, focal length, exposure compensation, metering pattern and if a flash was used.
This is especially helpful when you want to know what camera took one of your favorite shots and it was helpful to me before I purchased a new camera to see what shots taken with the camera looked like.
If anyone has any suggestions for a future Tech Tuesday with BenSpark, leave a comment or send me a message.
BenSpark Writes four blogs, is an avid kayaker and a Transformers fan, he also takes at least one photo every single day and posts it to his BenSpark Blog. You can visit him at The BenSpark, BenSpark 2: Electric Boogaloo, Flatwater Tech or The Wired Kayaker.
