Photo-A-Day 2.0 #00499
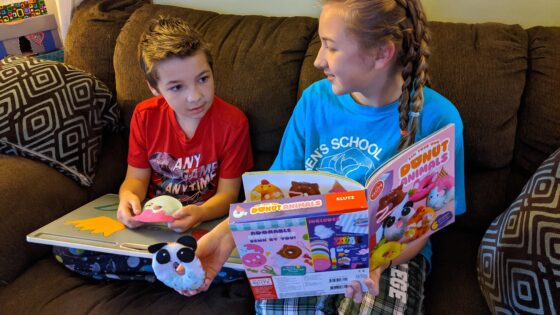
While touring the Klutz booth at Toy Fair 2020 I noticed the Sew Your Own Donut Animals activity set. I received a free review unit so that we could check it out. Opinions are our own. I knew that the kids would be excited about this set because they love donuts and animals. Andy is a huge fan of Narwhals and one of the animals inside is a Narwhal. We started working on that donut first. I helped Andy out and then had him do a portion of it. We’ll have to do more together later to finish it up.
The setif for grades 3 and up so kids 8 and up are the target for this. There are needles included and a sharp needle in younger hands may not be the nest idea. Now Eva has been learning how to sew in a sewing class. She started it before the COVID-19 quarantin. While we have been in quarantine she has been doing a lot of sewing both by hand and on Allison’s grandmother’s antique sewing machine. I asked Eva to sew any one of the donut animals and she did it completely on her own. She chose the anda donut.
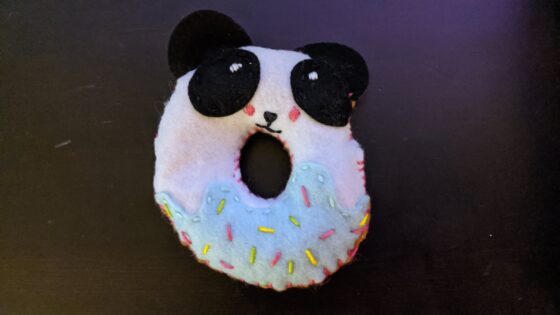
Like alll Klutz sets everything you need is included and ready to go for you. The embroidery floss, felt patterns, full color instruction book and more. The kids simply have to follow the instructions and sew the donuts. The book is fantastic and shows you many different types of stitches and they are used in various ways as you make the different donut animals. Klutz even includes a donut box to use to display your finished creations. You can make 6 donut animals from the set. They are a Panda, Narwhal, Kitty, Bunny, Hen, and Chick. This is the perfect time for kids to learn how to sew. They have the time and the set is pretty inexpensive for what you get. If you are so inclined to purchase a set please consider doing so through our Amazon.com affiliate link below. Klutz also offers some other adorable sewing kits including: Sew Mini Treats and Sew Mini Gardens. With each set being under $20 that’s a great deal for life skills and adorable crafts.
You can learn more about Klutz products at their various Social Media channels.
Klutz Website
Klutz on Twitter
Klutz on Facebook
Klutz on Instagram
Klutz on Pinterest
Klutz on YouTube